Who would have thought that LEGO would make a great set for using with GI Joe figures? The round pegs on the top of the bricks are just a dead give-away and just don't look good with the Joes.
Here are a few shots of a set that I built with LEGO and used with some of my troops.
 Duke gets ready, his only way out blocked by Cobra troopers.
 Here is a shot from the weekend Joedios.com Fatalities Theme. Duke put up a good fight, but he's not going to make it through this mission.
Here is a brief tutorial on how I made the set. Shouldn't it just be a simple process of throwing some bricks together? Yeah, it is, but I thought I'd go into a little more detail. You have to remember the principle for basic Lego construction. I learned this lesson when I was very young. Bricks must always be over lapped, just like in real world construction. If bricks are stacked in columns side-by-side, there is an inherent weakness to the structure. Any wall made of bricks is done by overlapping them The structure of the wall just becomes much more solid.
 The first step was to build the wall. I had a bunch of plain bricks and just decided to build a wall as a background for pictures. It's really surprising how many bricks get used when building something as simple as a wall. The objective is to get the wall tall enough to be somewhat appropriate in relation to the height of a figure. I didn't have enough white bricks to make a solid white wall, so I added the red and black highlights. I could have probably had just a solid red area, but I thought that the single black bricks acted as a way to break up the continual red bricks.
 This angle shows the side that will form the corner of the hallway.
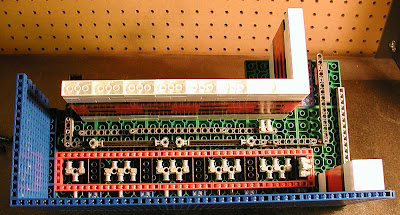
 A look at the roof panel. I used seven 8 x 16 x1 base plates and used the red flat strips to secure them.
 I added various detailing on the underside just to give the hall a utilitarian look. I used various Technic pieces as pipes and valves. I think a proper term would be "greebles".
  Duke and Helix show off the wall and the roof. I added a column for support. The steps of construction for this project began with the wall, moving on to the roof. I think that the wall may have been a bit taller, but once I built the roof, I knew that I needed a support column and sacrificed some of the original height of the roof in order to add the column.
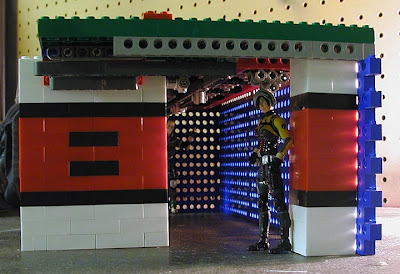
 A look at the fully assembled set with all walls attached. See all the greebles? Pipes, vents, conduits - I don't know what they are - just extra added detailing.

Another view from the side to give you an idea of different photographic angles. In general, Lego would not always make a great set piece for use with action figures, primarily because of the round pegs at the tops of each brick. I designed and built this with the idea that nearly all of the pegs would be covered up once construction was complete.
This was a fun little project and one that I would love to replicate on a much larger scale. I can imagine Lego's would serve as a great medium for building the walls of any secret military installation!
This was a fun little project and one that I would love to replicate on a much larger scale. I can imagine Lego's would serve as a great medium for building the walls of any secret military installation!


No comments:
Post a Comment